Constructing the Test and Development Environment
Overview
Introduction:
Creating a dedicated test and development environment for in-development sensors and systems is crucial to avoid risks to your larger ecosystem when adding new features or testing changes. In this blog post, I'll take you through the step-by-step process of constructing a small 12 x 12 Paludarium with a spray-bar for effective testing and development.
Acquiring the Materials
Here are the main materials I used when constructing this simple background
- Two cans of Great Stuff Spray Foam
- Egg crate
- Fine mesh netting
- 12 in x 12 in Acrylic Cube
- Substrate blend (coco fiber, bark, worm castings, sphagnum moss)
- Aquarium Silicone adhesive
- Electric pump
- Small river pebbles
- Sand
- "Fallen tree branch" element
Assembling the Structure
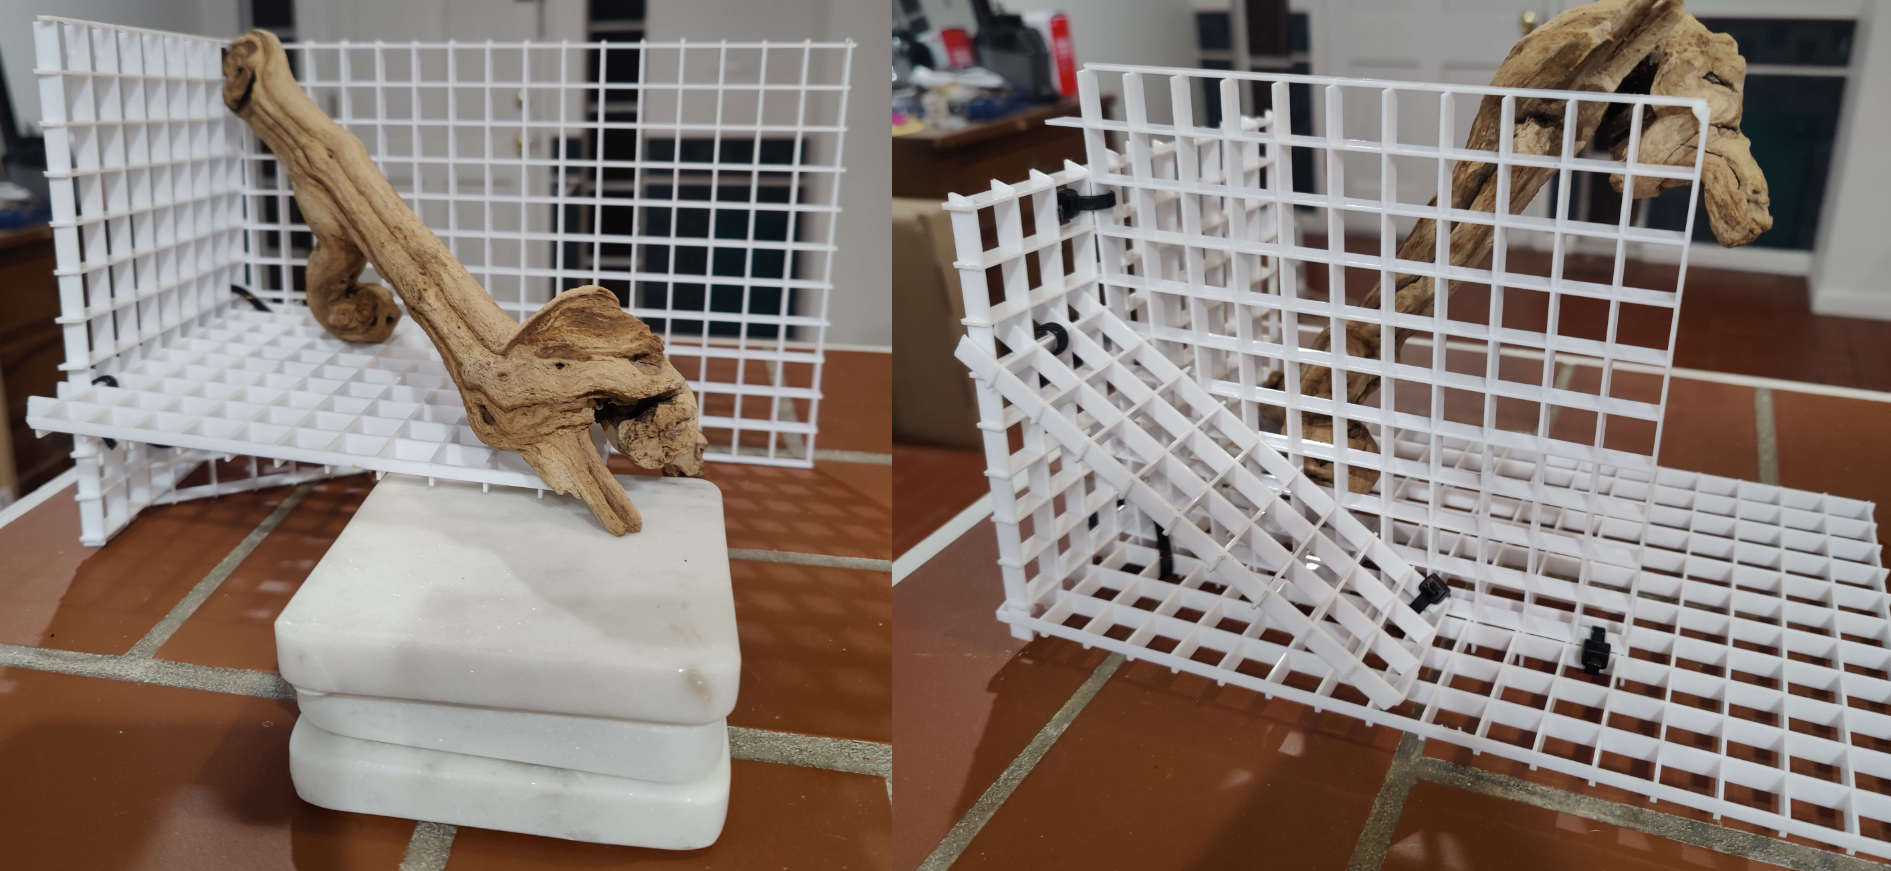
I used plastic egg-crate in order to create the skeleton platform that I would later cover in spray foam.
I constructed a false-bottom, which is essentially a platform with sufficient drainage so that soil does not become over-saturated.
This step also allows you to plan a little bit more how you would like everything to turn out and add some real foundation as well. I also implemented a sectioned off corner which the pump will eventually sit in.
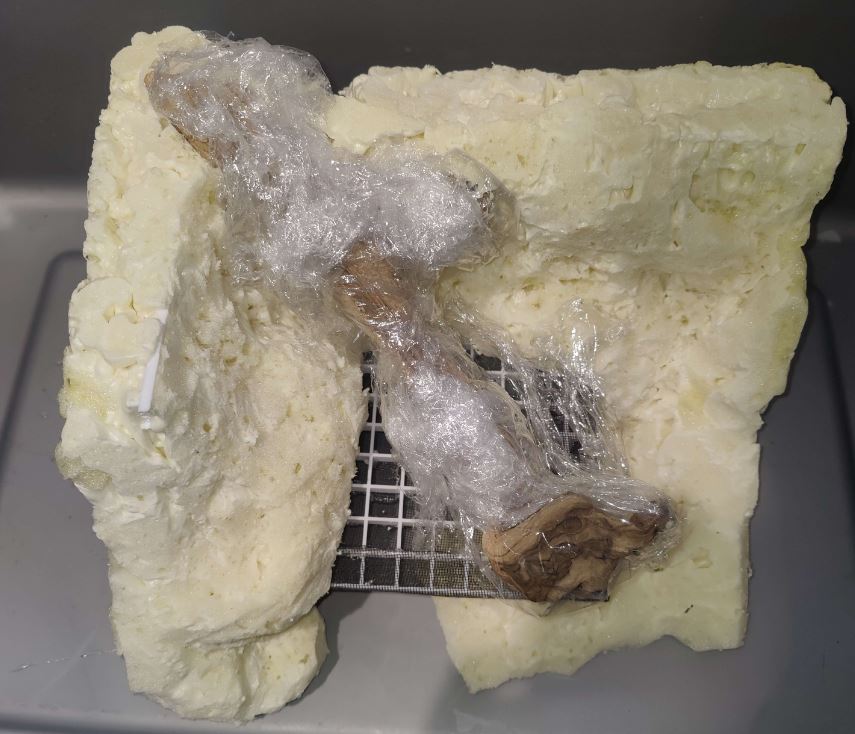
Testing the Fitment and Wrapping
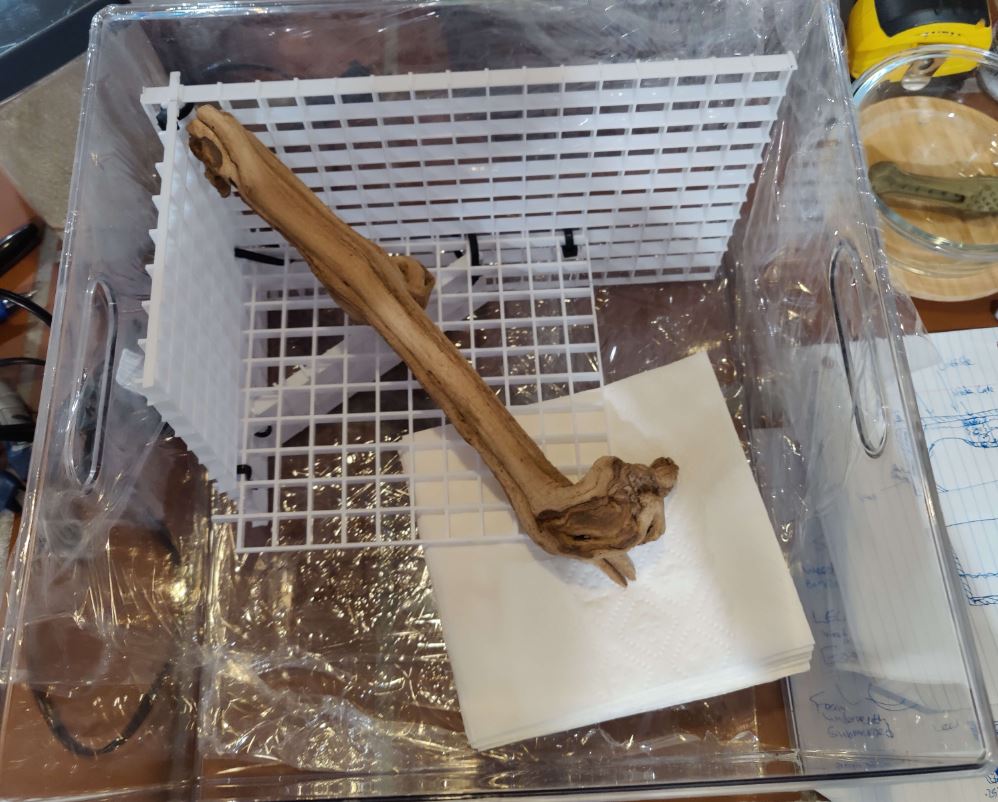
Once I made my initial structure, I placed it in the Acrylic cube and applied cling wrap to the bottom and sides. This allows us to remove the Sprayed-On resulting background without having it adhere or bind to the cube itself.
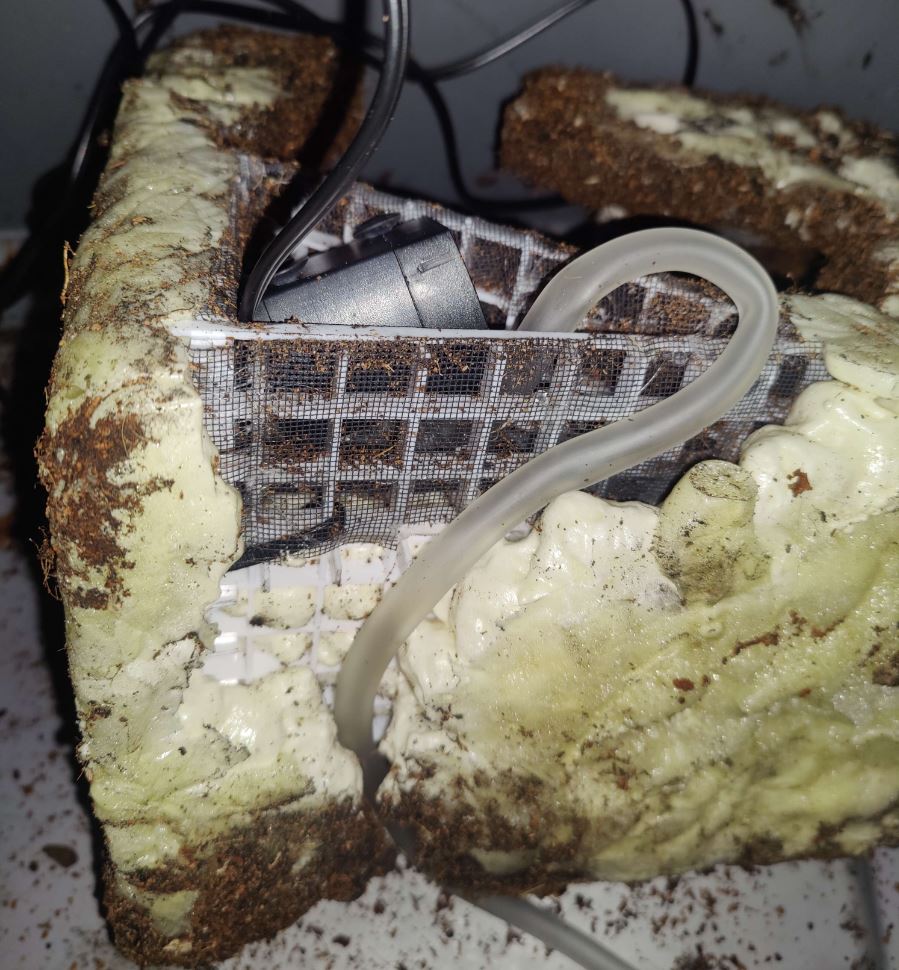
Adding Mesh

Next, I added fine mesh in order to prevent small debris from being sucked in to the area where the pump would sit, acting like a filter.
I "tack welded" the mesh with hot glue, which worked alright but I definitely would not recommend, or do again myself. I also tested how the simple branch element would sit at this point!
Spray Foam It Up
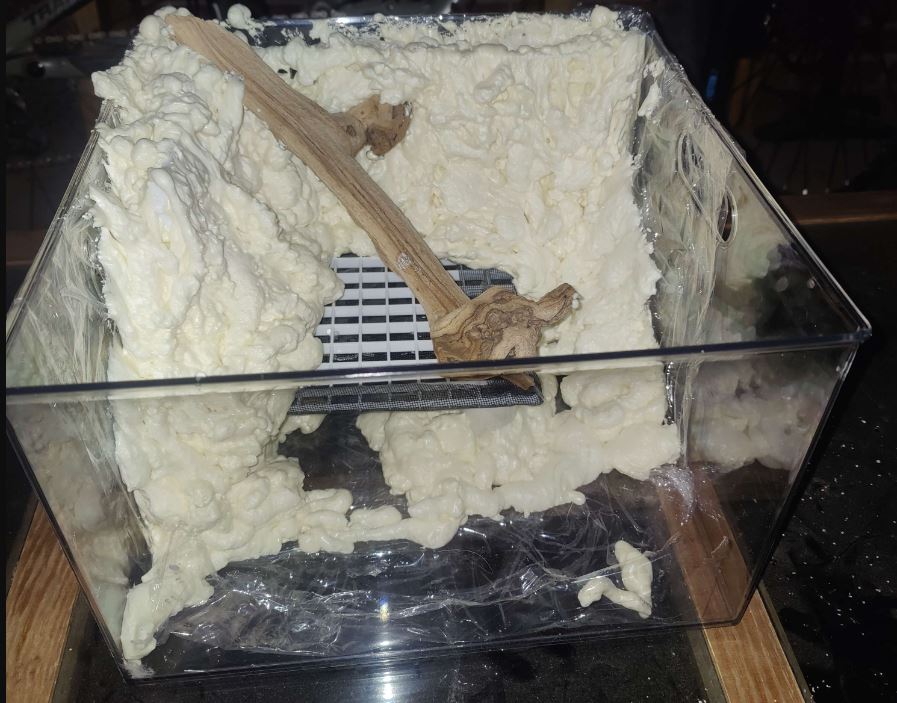
The process of applying the spray foam was kind of fun, but also smelled fairly awful. I recommend doing this in a well-ventilated area to both speed up curing and avoid smells.
In terms of technique and application, I mainly attempted to just evenly foam the entire frame and ensure it was covered. With the amount that the foam expands, even the small sized structure I made was now nearly covering the entire box.
I also ensured to keep an area un-sprayed which would allow me to route the water pump's tubing to the top of the feature.
You may notice some of the background already applied in this image. This is because the image was taken after the background was already cured, cut, and had silicone applied. Those steps are described next!
Curing
Once I finished the second spray can and deemed the job appropriate, I waited about two hours before pulling the background out of the cube along with the cling wrap.
In terms of speed, removing the wrapping also exposes the sides which will allow the overall background to dry out faster. It took about two days for it to fully cure!
I did not add skewers for ventilation, but I read afterwards that may adding holes may assist in curing parts of the foam which may still be fairly wet, as the inside is not exposed to air regularly.
Cut the Background
One of the more tedious and annoying parts is to cut your cured foamy background in order to expose the rough and porous surface of the foam.
According to others online, if you simply apply silicone adhesive to the regularly smooth surface of the foam, it does not adhere as well and also causes problems with adhering the substrate background to the foam as well.
That being said, it took multiple hours and a significant amount of leftover foam bits had to be cleaned up while trimming the background. In effect, this may also make it look more rocky or craggly!
Apply Black Aquarium Silicone
This step is one of the more time-sensitive steps, and involves smearing a thick enough layer of silicone across the background, upon which I placed the substrate mixture. Unfortunately I forgot to take a picture of the covered background before applying the substrate, so I have instead added a picture of another Vivarium that used this same technique.

In the future, I intend on using Hygrolon, a mesh that wicks water very effectively, and will instead affix it to the spray-foam surface, though I wanted to try out this novel method first!
Once I applied an excess amount of substrate to the background, I waited an additional 5-6 hours for it to cure before shaking the background of any excess substrate.
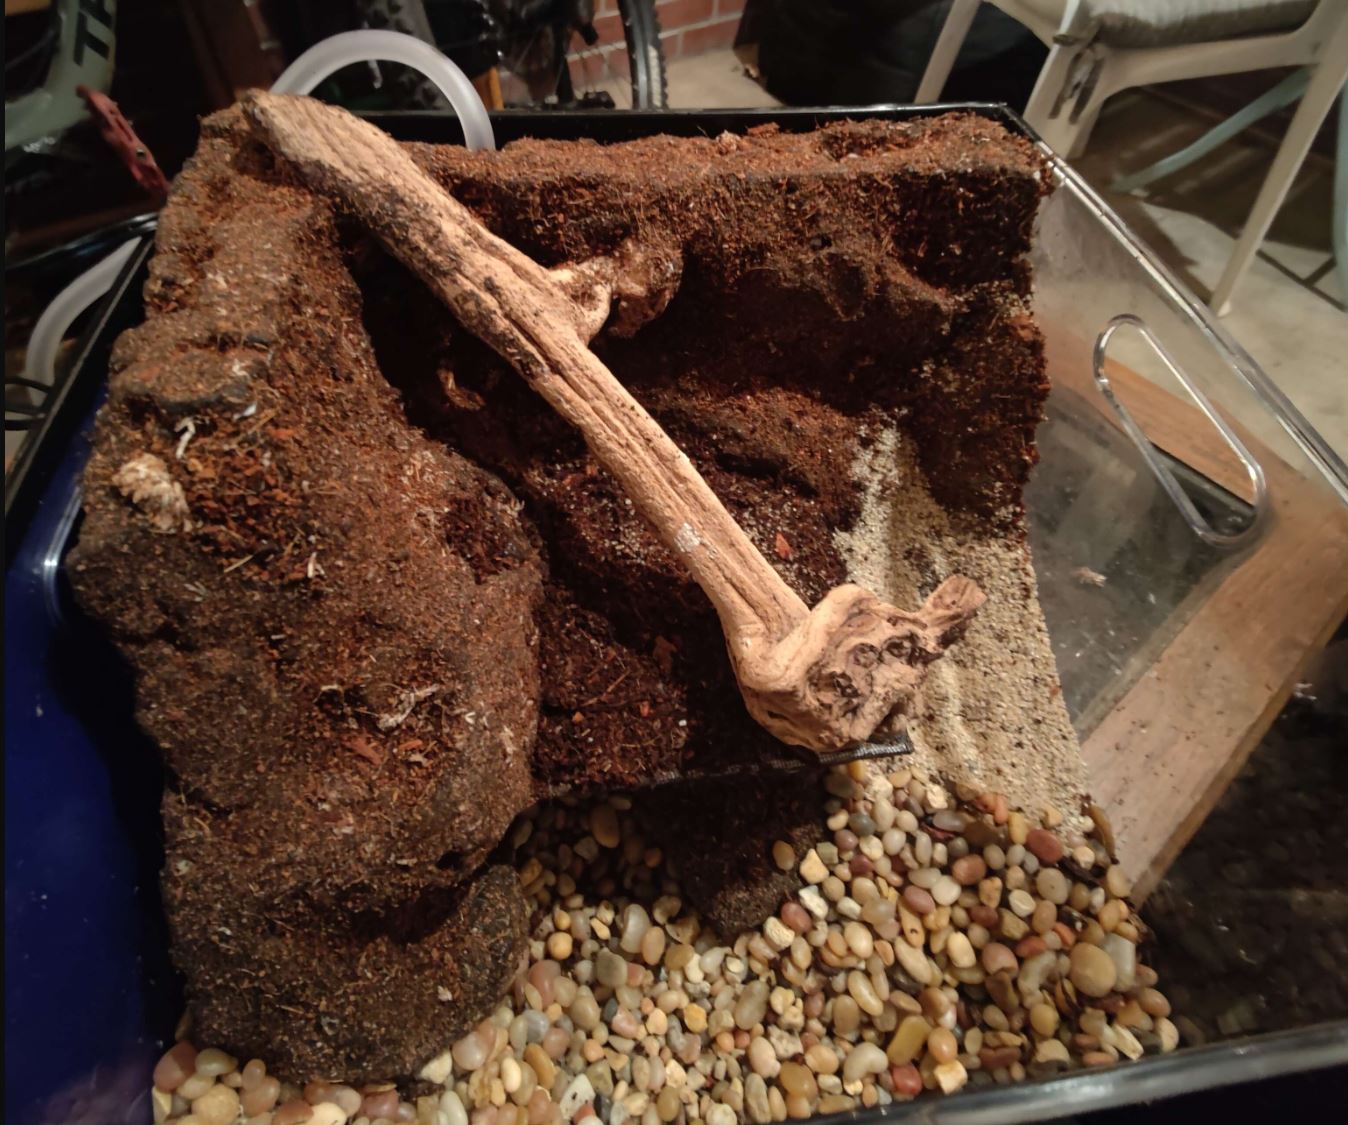
Finishing Landscape Touches
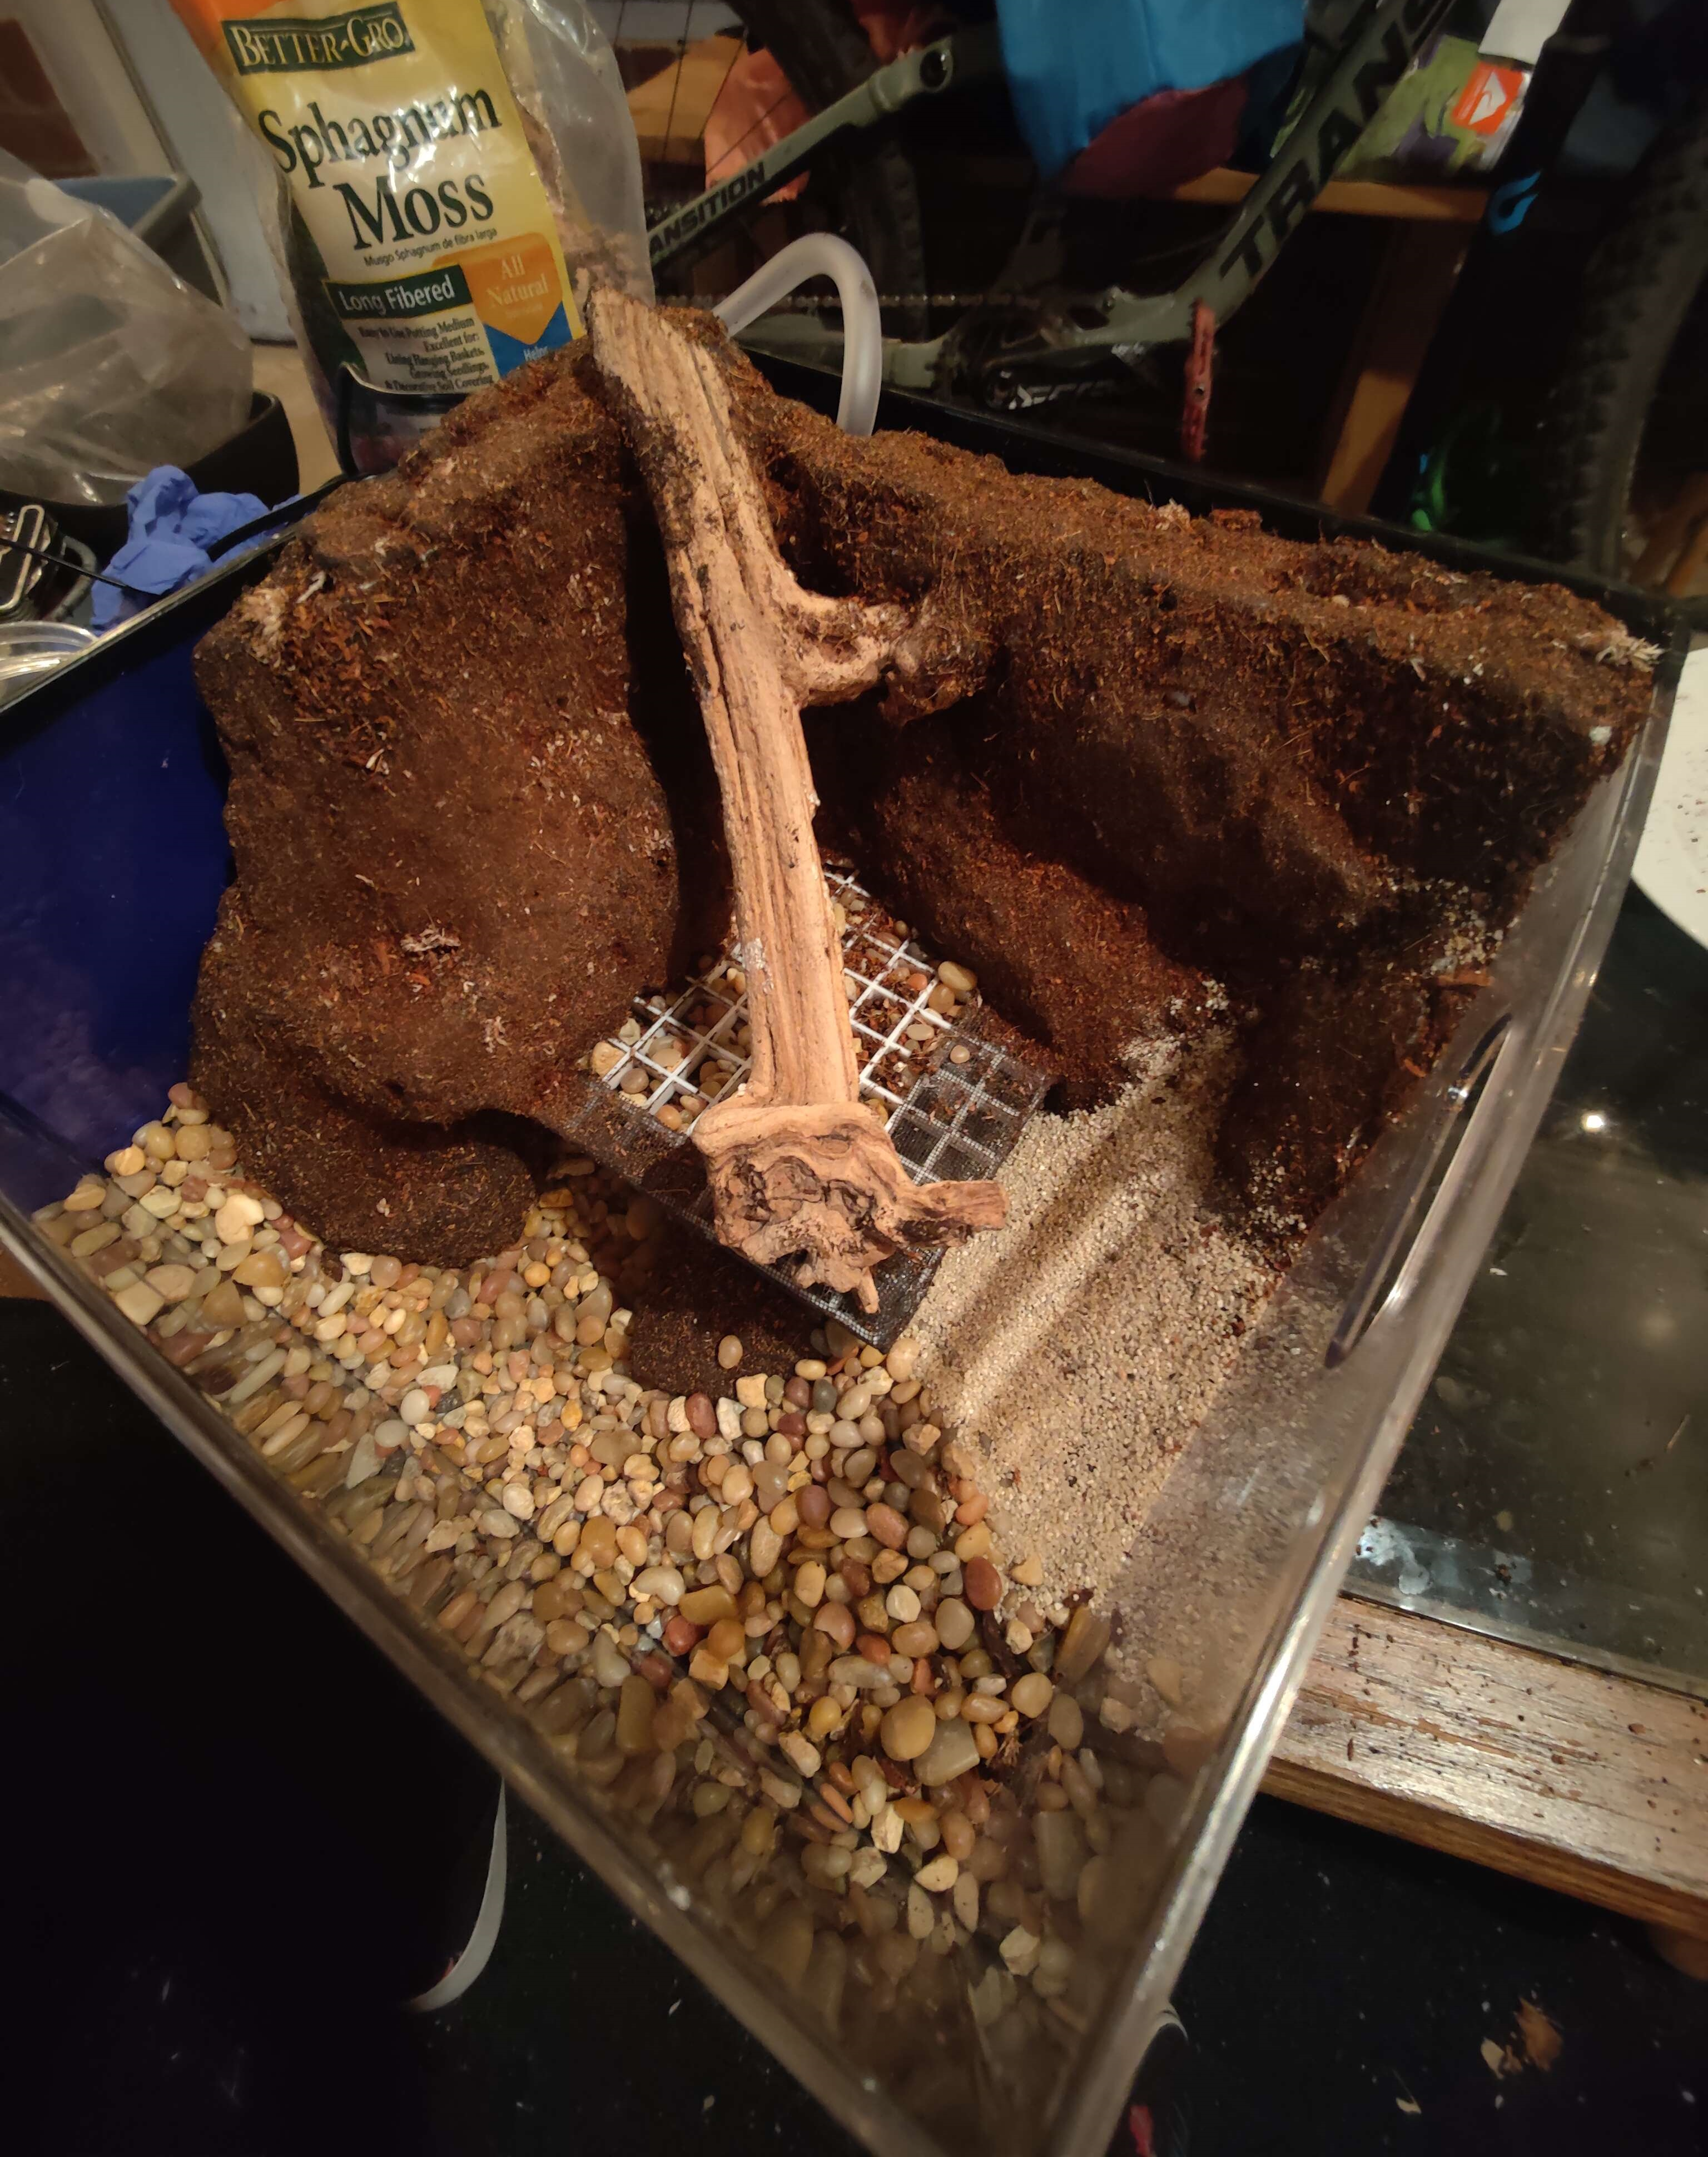
One of the last steps in the initial construction was to add a small rocky basin as well as some sand to split up the environment more. I also covered the main platform with substrate at this point.
Unfortunately, I realized after that some of my egg crate is exposed and I am not entirely sure how to fix it at this point. In the future I will likely spray-foam the platform itself as well, to create a small barrier between the water and the false-bottom.
Test the Pump and Filtration
Tomorrow I will most likely add water to this new tiny and physical Dev Environment! I'm excited to continue, though I'm certain there will be some issues along the way!
Once the water is running correctly, I can introduce some plant-life, namely some Java moss and a few other goodies, then developing and testing early Embedded systems will begin!